Updated February 3, 2023
This guide will explain how to turn off the gas to your home and how to cap the gas line.
This is something you will have to do before beginning any demolition or construction project in your home, garage, or anywhere that gas is fed.
Contact your gas company before starting a demolition project that involves shutting down the gas supply to ensure proper safety precautions are followed.
How to Turn off the Gas:
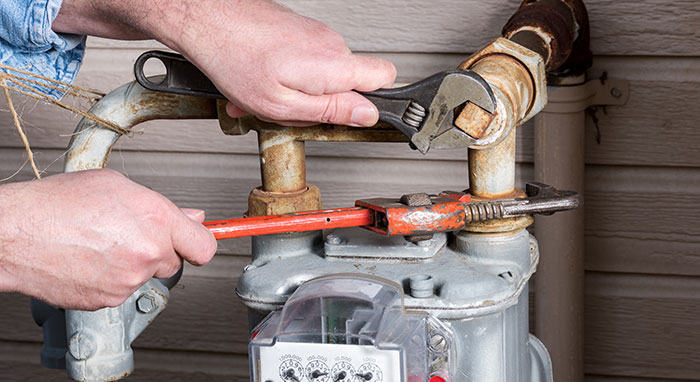
1. Find the gas meter.
They are most commonly found near the garage or the front/side of the house. The main gas valve is located at the gas meter.
2. Locate the main valve.
There are two pipes attached to the gas meter. One feeds gas from the gas supplier into the meter, and one feeds gas from the meter into your house. The main valve is located on the pipe that comes into the meter from the supplier. It looks like a thick rectangular metal tab with a hole. (When the valve is on, it is parallel to the pipe. When the valve is off, it is perpendicular to the pipe.)
3. Turn off the valve.
Use a crescent wrench to turn the valve 90 degrees. There will be another metal rectangular tab that is fixed, which runs perpendicular to the gas line. When the gas is turned off all the way, the hole on the main valve tab will line up with the other metal tab on the line.
4. Turn off the gas line.
Be sure that the gas line's valve is also switched to the “off” position.
How to Cap the Gas Line:
1. Remove fittings and any additional piping.
Loosen and remove the fittings/piping by holding the valve with one crescent wrench and loosening the fitting with another crescent wrench. You can also use a pipe wrench for this.
2. Clean the pipes with steel wool.
Brush the threading with steel wool until it’s clean. Wipe away any wool fibers on the pipe.
3. Apply Teflon pipe dope or tape to the cap.
- Option 1: Wrap gas-rated yellow Teflon tape tightly around the thread of the cap—five times is ideal. Wrap the tape clockwise to prevent it from unraveling as you thread it.
- Option 2: Apply Teflon pipe dope evenly along the threads of the gas line.
4. Use the appropriate cap.
Use the same kind of cap as the pipe, i.e. use a brass cap if the pipe is brass, use a corrugated stainless steel cap if the pipe is corrugated stainless steel, etc. Screw the cap onto the pipe with your finger, then use the double-wrench technique to tighten the cap completely. Be careful not to overtighten the cap; you could crack the cap, causing a gas leak.
5. Check for gas leaks.
Turn the main gas back on, then go back to the line and turn its valve on, too. Then, spray a mixture of half-dish-soap-half-water onto the gas cap. If you don’t observe any bubbles, there are no leaks, and the cap is installed correctly. If you do see bubbles, there is a gas leak. Repeat the previous steps until there is no longer any leaks.
6. Relight pilot lights.
If the pilot light on your water heater or other appliances went out, you will need to relight them as needed.
Do you need help finding a qualified demolition contractor to assist with your project? Hometown can help.
Easily browse local demo companies, read customer reviews, and request free quotes to compare services and pricing.
Learn more: